Add Facebook Messenger Live Chat on Squarespace
Table of Contents
Do you want to have live chat on your website but don't want to have to log into a new system that you've never used before? Why not use Facebook Messenger? When people come to your website, they can use the live chat to talk directly with you except you'll appear as your business. So instead of your name, it'll show your Facebook page. This feature is currently in use right now on this website, you should see the messenger icon on the bottom left of the website.
Here's how you get Facebook Messenger added to your Squarespace website.
Step 1 - Getting the code
Facebook automatically creates the code for you, so there's no need to know how to code. First, go to your Facebook page on your computer (not via the mobile app) and click SETTINGS in the top right.
Now click on the ADVANCED MESSAGING tab and look for a section for WHITELISTED DOMAINS. In here, copy and paste your website URL. This is so that your website has permission to use Facebook Messenger acting as your page.
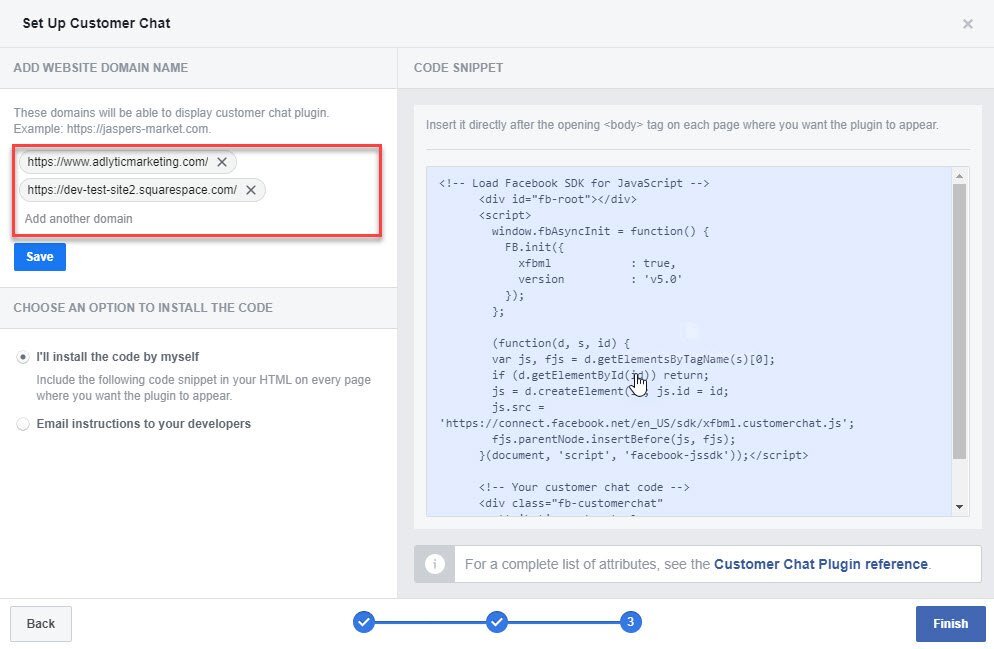
*Please note: When you're editing your Squarespace website, the URL is actually something like 'random-word-asd1w.squarespace.com' so you won't see the Messenger icon on the backend unless you add the "ugly" Squarespace URL as a domain as well.*
Now we click on MESSAGING on the left and then look for a section with the label "Add Messenger to your website" and click the GET STARTED button.
There's no settings that you have to change here, but if you want a custom greeting or custom messenger icon color, you can designate those here.
When you get to the page with the code, hover over the code to copy the code. While on this page, just double check that your website domain is listed on the top left.
Step 2 - Adding Code to Squarespace
Now that you have the code, go to your Squarespace website and then go to SETTINGS → ADVANCED → CODE INJECTION. Since we want the website to load quickly, we want to delay the Facebook Messenger code from executing right away. So instead of adding it to the HEADER field, add it to the FOOTER field instead and then click SAVE.


